API Access Management
API Access Management allows you to build custom authorization servers in Okta, which can be used to protect your own API endpoints, or use Okta’s Org Authorization Server. See Available authorization server types.
An authorization server defines your security boundary, for example “staging” or “production.” Within each authorization server you can define your own OAuth scopes, claims, and access policies. This allows your apps and your APIs to anchor to a central authorization point and leverage the rich identity features of Okta, such as Universal Directory for transforming attributes, adaptive MFA for end-users, analytics, and system log, and then extend it out to the API community.
At its core, an authorization server is simply an OAuth 2.0 token minting engine. Each authorization server has a unique issuer URI and its own signing key for tokens in order to keep proper boundary between security domains. The authorization server also acts as an OpenID Connect Provider, which means you can request ID tokens in addition to access tokens from the authorization server endpoints.
How do you know if you need to use Okta’s Org Authorization Server or a custom authorization server?
- You need to protect non-Okta resources.
- You need different authorization policies depending on whether the person is an employee, partner, or end user, or other similar specializations.

Note
If your employees, partners, and users can all use the same authentication policies for single sign-on, try the built-in Org Authorization Server.
To manage authorization between clients and Okta,
- Identify the scopes and claims in your client app and register it with Okta.
- Create one or more authorization servers and define the scopes and claims to match those expected by your app.
It doesn’t matter which task you do first, but the client app must recognize the scope names and be expecting the claims as defined in the authorization server.
To create and configure an authorization server, follow these steps:
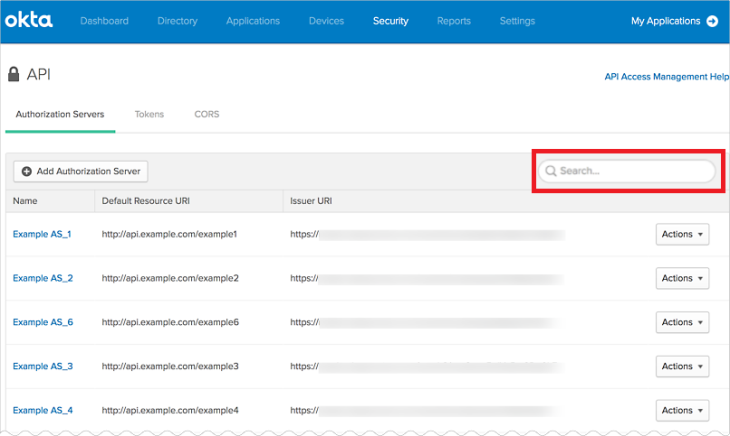
- From the dashboard, select Security > API, and select the Authorization Servers tab. Then, click Add Authorization Server and supply the following editable information.
Issuer, Metadata URI, and Last Rotation are not editable.
- Name
- Audience – URI for the OAuth resource that consumes the Access Tokens. This value is used as the default audience for Access Tokens.
- Description
- Issuer – If you enabled and defined a custom URL domain, the Issuer field defaults to the custom URL and appears in the format Custom URL (https://id.example.com). Use the dropdown arrow in the field to select the organization URL.
- Signing Key Rotation – Automatic or manual. (Manual should only be used for clients that are unable to poll the authorization server to update their list of signing keys automatically. If you use manual, Okta recommends that you rotate keys every three months.)
Alternatively, you can choose Dynamic, which allows either the organizational or custom domain to be used, depending on the request domain.
This is an Early Access feature. To enable it, contact Okta Support.
When complete, your authorization server Settings tab displays the information that you provided and allows you to edit it.

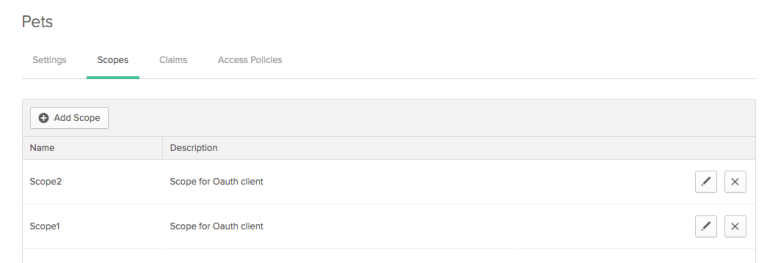
Scopes represent high-level operations that can be performed on your API endpoints. These are coded into applications, which then ask for them from the authorization server, and the access policy decides which ones to grant and which ones to deny.
If you need scopes in addition to the reserved scopes provided, create them now.
-
Choose the name of the authorization server to display it, and then select Scopes.
- Choose Scopes > Add Scope,
- Enter a name and description.
- Check User Consent to require user consent for this scope.
- Optional. If User Consent is selected, clear the check box Block services from requesting this scope.
If unchecked, consent is required when a user is interacting with an application but not if the scope is requested directly from a service application to the authorization server. For more information, see Flexible consent.
-
Select Default scope if you want to allow Okta to grant authorization requests to apps that do not specify scopes on an authorization request. If the client omits the scope parameter in an authorization request, Okta returns all default scopes in the Access Token that are permitted by the access policy rule.
-
Click Save.
These scopes are referenced by the Claims dialog.
Note
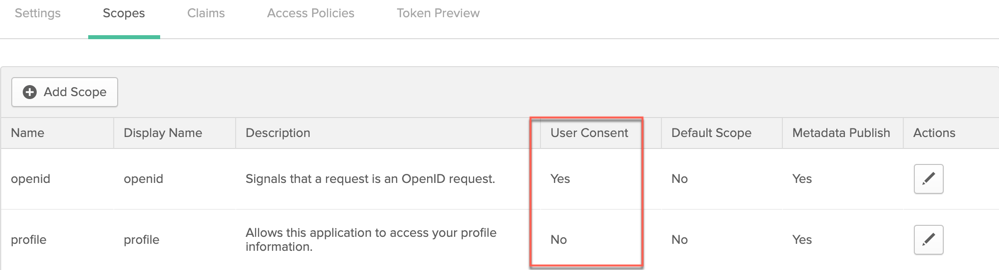
If you create an app that uses the User Consent for OAuth 2.0 and OpenID Connect Flows feature, set the User Consent to Yes for the scope, as shown below.
Tokens contain claims that are statements about the subject or another subject, for example name, role, or email address.
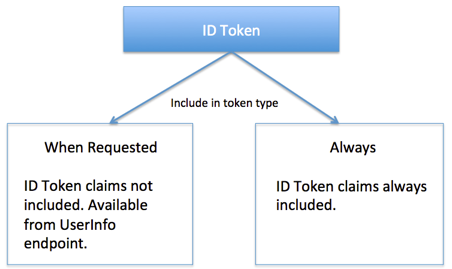
ID Token claims are dynamic. By default, the Authorization Server does not include them in the ID Token when requested with an Access Token or authorization code. To use this default, select When Requested for Include in token type.
To force the Authorization server to always put an ID Token claim into the ID Token, select Always for Include in token type.
Note
If the claim is not included, the client must use an Access Token to get the claims from the UserInfo endpoint.
Create ID Token claims for OpenID Connect, or Access Tokens for OAuth 2.0:
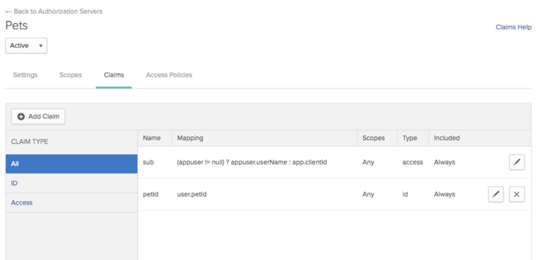
- Choose the name of the authorization server to display it, and choose Claims. Okta provides a default subject claim. You can edit the mapping, or create your own claims.
-
Choose Add Claim and provide the requested information.
- Name
- Include in token type: Choose the token type in the first dropdown box. Select Access Token (Oauth 2.0) or ID Token (OpenID Connect). . In the second dropdown box, choose Always or Userinfo/id_token request.
- Value type: Choose whether you’ll define the claim by a group filter or by an Expression written in Okta Expression Language.
- Mapping: This option displays if you chose Expression in the previous field. Add the mapping here using Okta’s Expression Language, for example
appuser.username. Be sure to check that your expression returns the results expected–the expression isn’t validated here. - Filter: This option displays if you chose Groups in the previous field. Use it to add a group filter. If you leave it blank, all users are specified for this claim.
- Mapping: This option displays if you chose Expression in the previous field. Add the mapping here using Okta’s Expression Language, for example
- Disable claim: Check this option if you want to temporarily disable the claim for testing or debugging.
- Include in: Specify whether the claim is valid for any scope, or select the scopes for which it is valid.
While in the Claims list, you can:
- Sort claims by type.
-
Delete claims you’ve created, or disable claims for testing or debugging purposes.
- Choose the name of an authorization server.
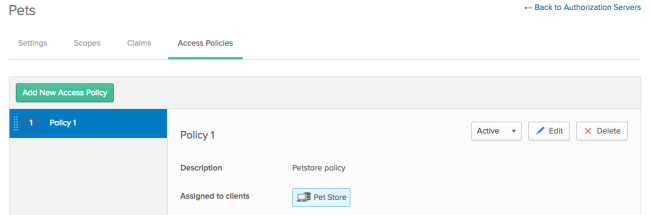
- Choose Access Policies > Add New Access Policy.
- Provide the requested information:
- Name
- Description
- Assign to All clients, or select The following clients: and enter the name of the clients covered by this access policy.
While in the Access Policy list, you can:
- Set access policies to be active or deactivate them for testing or debugging purposes.
- Reorder policies to change the order policies are evaluated.
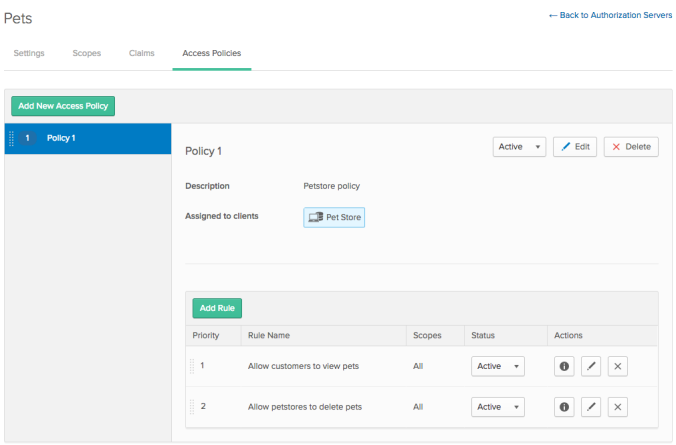
Polices are evaluated in priority order, as are the rules in a policy. The first policy and rule that matches the client request is applied and no further rule or policy processing occurs.
Rules control the mapping of client, user, and custom scope. For example, you can specify
a rule for an access policy so that if the user is assigned to a client, then custom scope Scope1
is valid.
- Choose the name of an authorization server, and select Access Policies.
- Choose the name of an access policy, and select Add Rule.
- Enter the requested information:
- Rule Name
- IF Grant type is – Select whether the client is acting on behalf of itself or on behalf of a user. You can select both. If the client is acting on behalf of a user, select any or all of the methods.
- AND User is – This option only appears if you checked Client acting on behalf of a user above. You can choose Any user assigned to the app, or define the users further.
- AND Scopes requested – Choose the scopes (any scopes, or a list that you specify) that are granted if the user meets any of the conditions.
- THEN Use this inline hook – If applicable, choose an inline hook. See Inline hooks.
- AND Access token lifetime is – Choose the length of time before an access token expires.
- AND Refresh token lifetime is – Choose the length of time before a refresh token expires.
Under the Refresh token lifetime, enter a time period during which the token must be used to validate and continue its specified lifetime.
Note
The expiration period must fall within the access token lifetime and the refresh token lifetime. The maximum expiration period is 5 years. Tokens not used during the expiration period will expire even if their lifetime is set to Unlimited.
- Choose Create Rule to save the rule.
While in the Rules list for an access policy, you can:
- Set a rule to be inactive for testing or debugging.
-
Reorder rules, except for the default rule in the default policy. Rules are evaluated in priority order, so the first rule in the first policy that matches the client request is applied and no further processing occurs.
Note
Service applications (client credentials flow) have no user. If you use this flow, make sure you have at least one rule that specifies the condition No user.
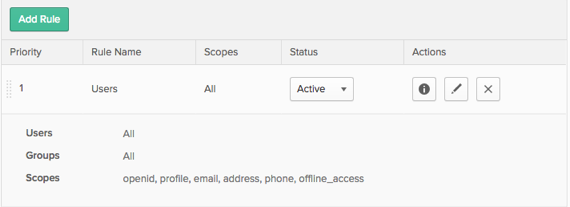
-
Selecting the information icon or clicking on the rule name displays the users and groups the rule applies to, as well as the scopes that are granted to those users and groups, as shown below.
To test combinations of scopes, claims, clients, and users, you can issue API calls against your authorization server. Then you can confirm that the server returns the expected token information.
Token preview for OpenID Connect ID or OAuth 2.0
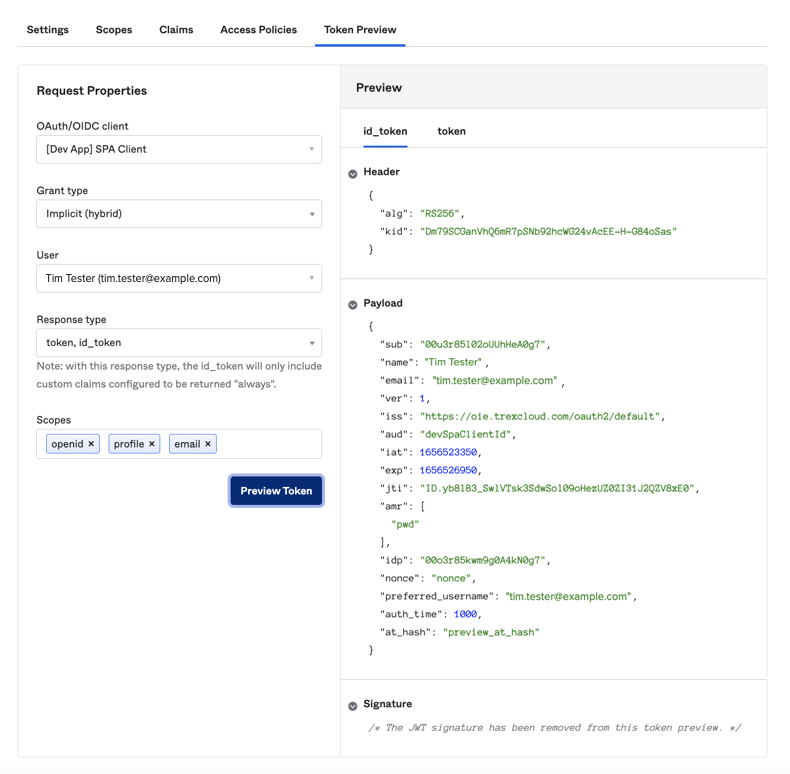
Configuring the tokens for an OAuth 2.0 or OpenID Connect application or integration can be a complex operation. Okta has made it easier to choose configuration settings and see the resulting tokens in the Token Preview tab.
The Token Preview tab of the Authorization Server page helps you to choose configuration settings and view the resulting token:
- Access token
- ID token
- Refresh token
- Device secret
Add or change values in the Request Properties panel to see the effect on the returned tokens on the right. Use the dropdown lists to customize the toke request. For User, enter in the first few letters to search from a choice of users. You can try out different combinations of values and see the resulting tokens or error messages.
To delete an authorization server, click the Actions button to the right of the authorization server name, and then click Delete.
You can't delete the default authorization server from your org. Okta identifies this authorization server with a Default label in the Authorization Server page.
Use the search field to search on the exact name of the authorization server or Resource URI.
You can set an authorization server to manually rotate keys. Keys are rotated automatically by default.
Automatic key rotation is more secure than manual key rotation. Use manual key rotation only if you can't use automatic key rotation.
To change an authorization server configuration, follow these steps:
- Log into the Okta org.
- From the Admin Dashboard, go to Security > API.
- Open an authorization server for editing.
- Change the value of Signing Key Rotation to Manual and save.
- In the authorization server Settings tab, click the Rotate Signing Keys button to rotate the keys manually. This button doesn’t display when Signing Key Rotation is set to Automatic.